To create a gallery walk activity with QR codes you will need a set of set of iPads for the students, and QR codes that you have printed previously using the-qrcode-generator.com and Google Docs. Follow these instructions to setup your QR gallery:
Generating the QR codes
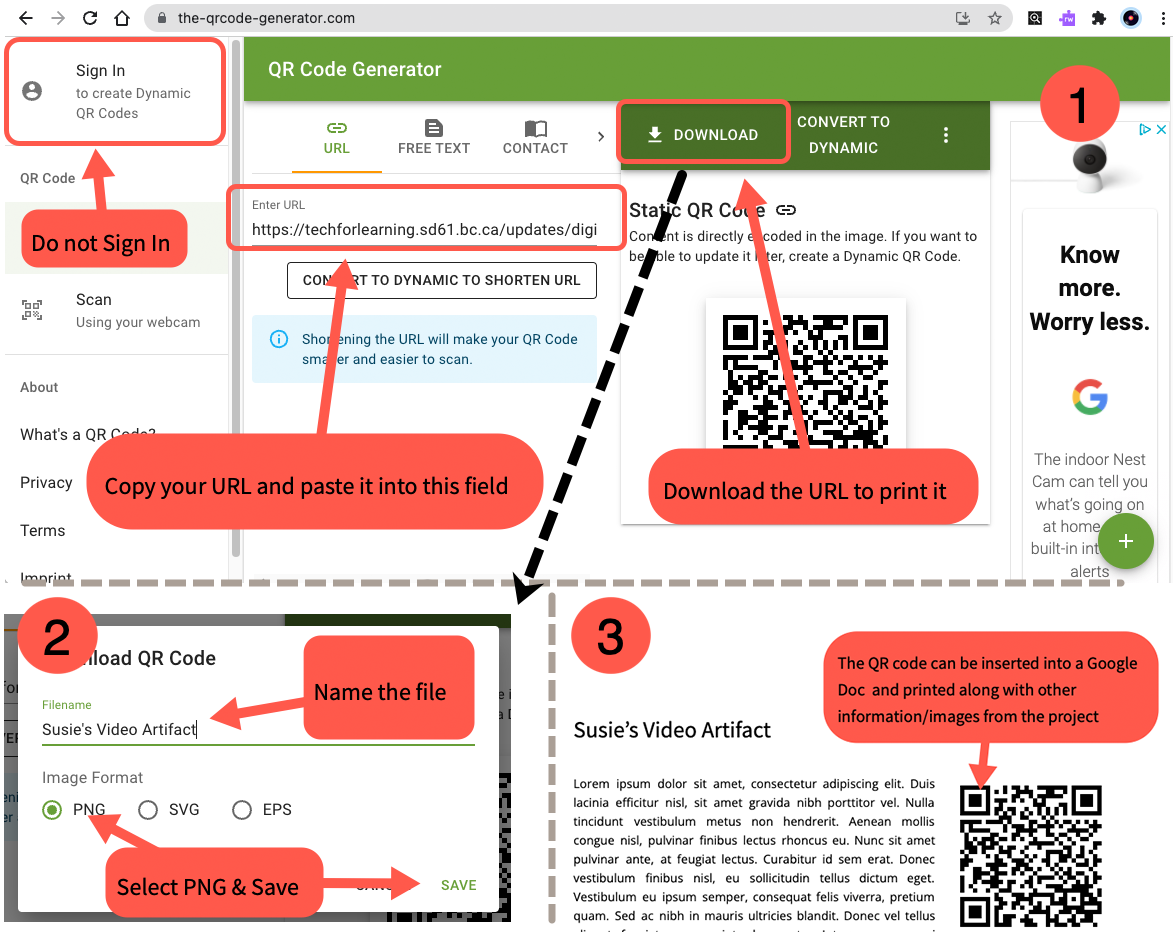
Collect the URLs of student supplied artifacts (videos, slides presentations, images, etc) from Google Drive and/or have students go to the-qrcode-generator.com.
- Do not sign into the service. Paste the URL into the appropriate field. A QR code will be generated. Click the Download link.
- In the dialog box choose PNG as the file format, and give the file a unique name.
- Open a Google Doc and insert the image. Add as much text as required to distinguish the code/artifact from others that will be displayed. Print the Google Doc.
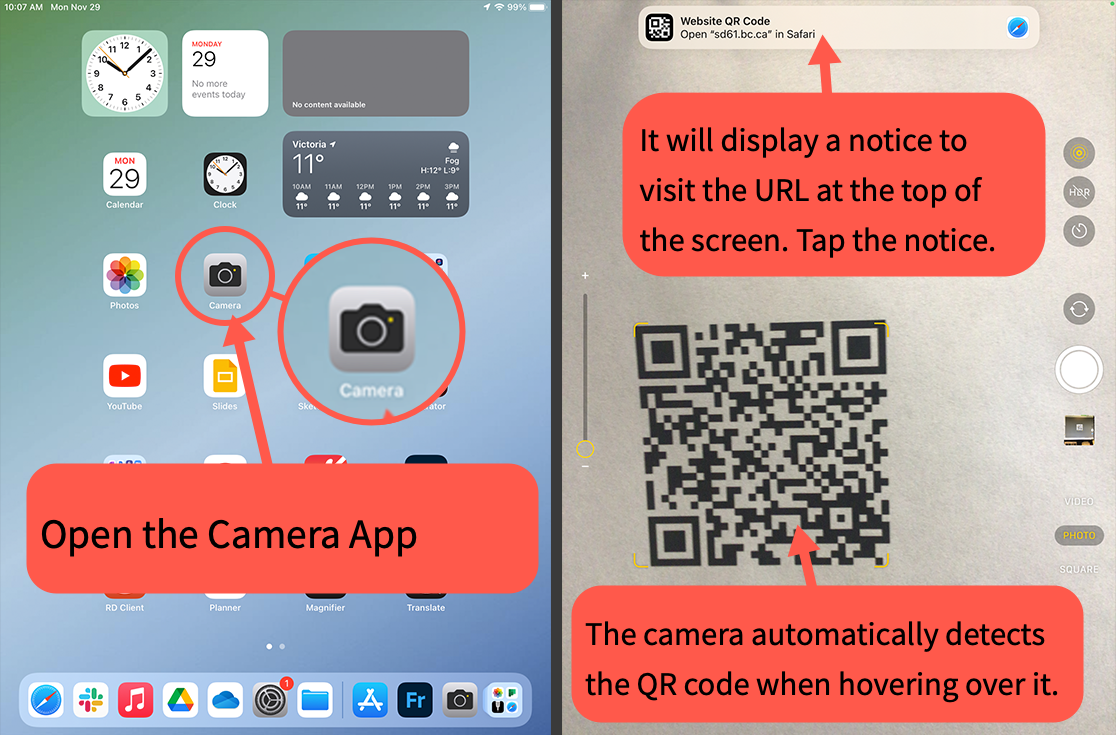
Viewing the QR Codes
iPads should be setup to recognize QR Codes automatically. Students just need to open the camera app, point it at the QR code and then tap the link notification that appears at the top of the screen.
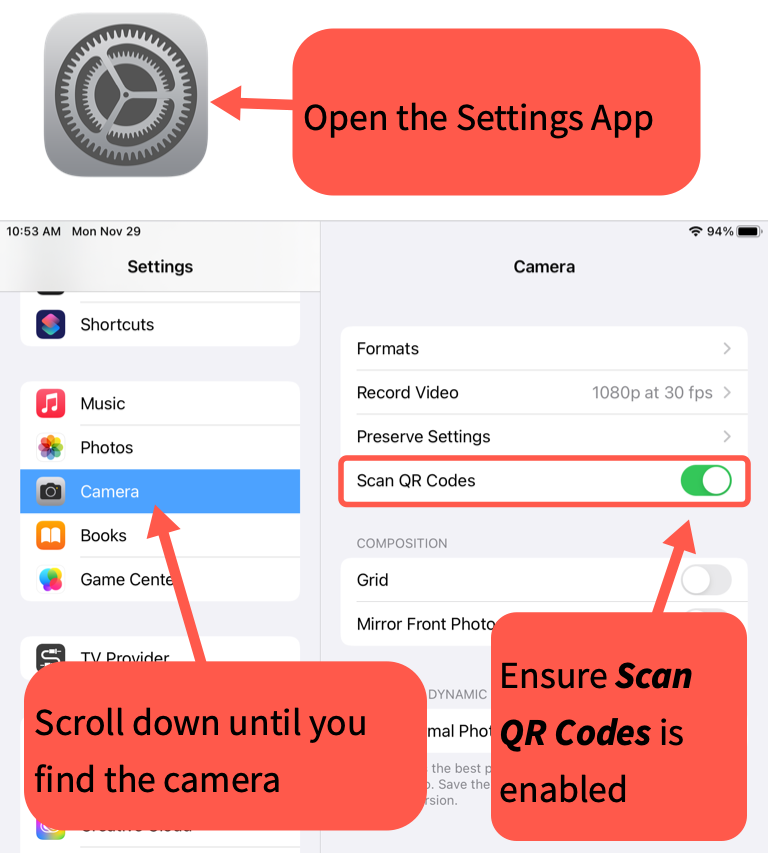
Troubleshooting
If the iPad does not show a notification at the top of the screen exit the camera app and then open it again. If this does not work the auto-recognition feature may have been disabled. Open the Settings app on the iPad and navigate to the Camera section.