
JUMP TO: Adding Unavailability|Creating Video Conferencing Links | Review Appointments in the App
Reviewing your Appointments
The easiest way to review your appointments is to use the Outlook Web App. The desktop version of Outlook will also work, but may look a bit different than the diagram published below.
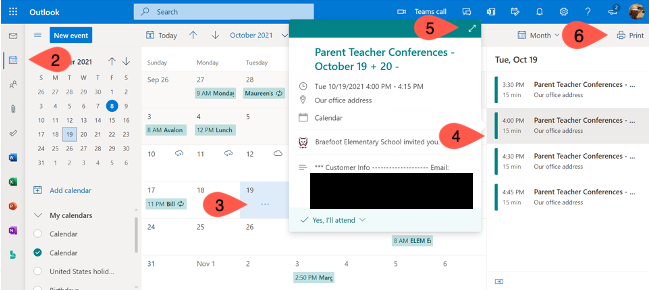
- Open the Outlook Web app in your browser.
- Click the calendar icon on the left-hand side of the window
- Click on the date you want to review
- Booked appointments will show up on right hand side; click one to see details
- Expand the window further to see more details about the appointment
- Use the Print icon to bring up the print dialog and follow the instructions below to get a detailed print out of your appointment schedule
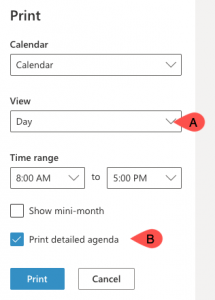
When in the Print Dialog Box
Modify the settings on the left hand side of the dialog box as follows:
A. Change the View dropdown to Day
B. Check the box that says: Print detailed agenda
Reviewing Appointments in Bookings
Finding Your Calendar
Teachers can go to the bookings site itself: https://outlook.office.com/bookings/ to review their appointments. This is particularly useful when doing a multiple booking (ex. student led conferences) because Outlook does not display names for multiple bookings.
- The first time you go to this URL you may have to click a button saying “Get it now,” do this if prompted.
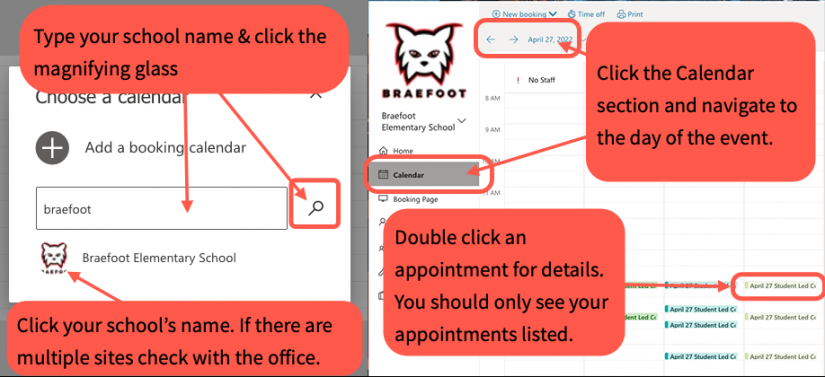
- If it asks you to Choose a calendar type the name of your school and then the search button.

- If you do not get this prompt look for a Discover calendars search button in the upper right hand side of the screen (see screenshot).
- Search for your school’s name.
- Please do not create a new calendar. All school calendars have been created. If you’d like to create your own appointment scheduler in Bookings please talk to your office or create a Helpdesk ticket.
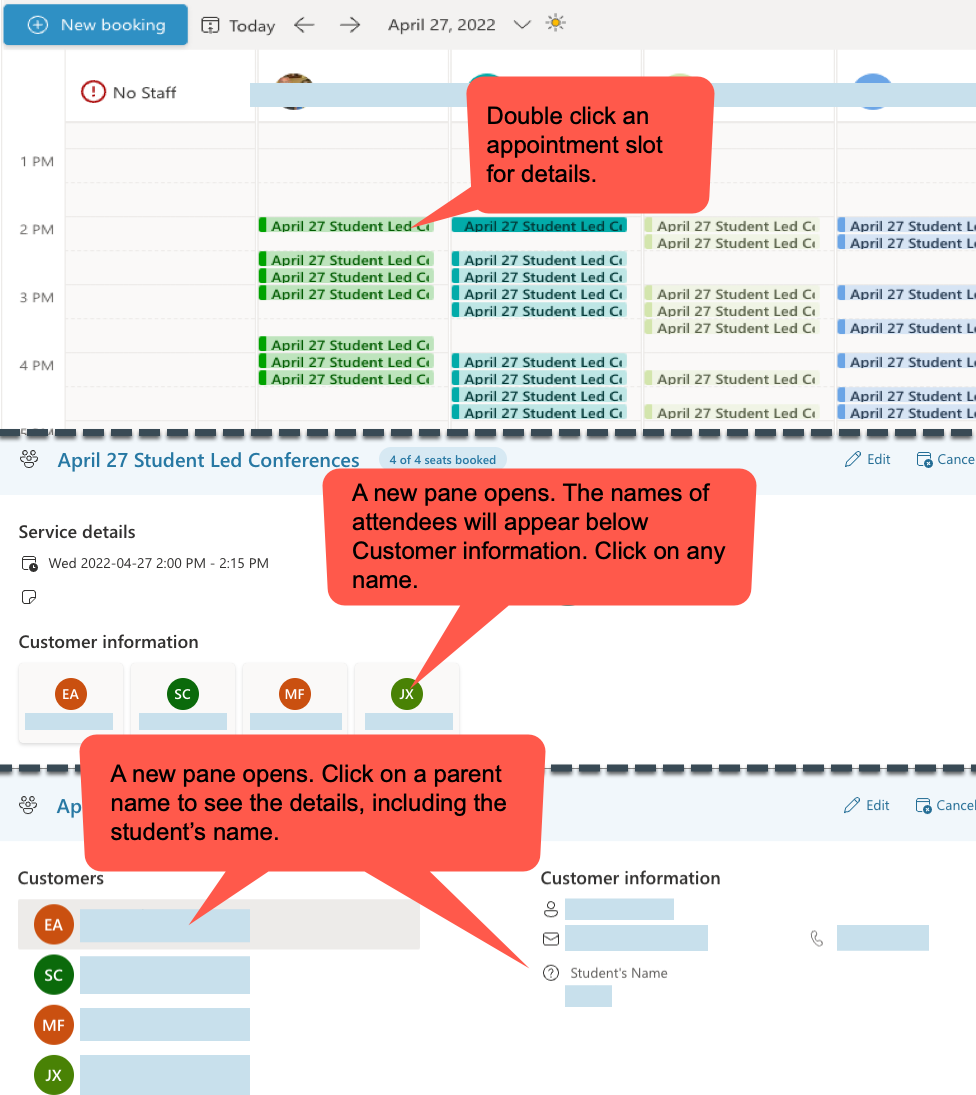
Getting Appointment Details
- Double click on an appointment
- You will see a Customer name field. Click the name (or a name if there are multiples) to view the details
Adding Availability
Teachers at some schools may be responsible for booking out times when they are unavailable. There are two methods for doing this, your office will direct you to the one they want you to use:
Book Out Using Bookings
Go into the booking service before it is sent to parents. Select the times you want to be unavailable and create a booking for yourself during these times using a personal email address.
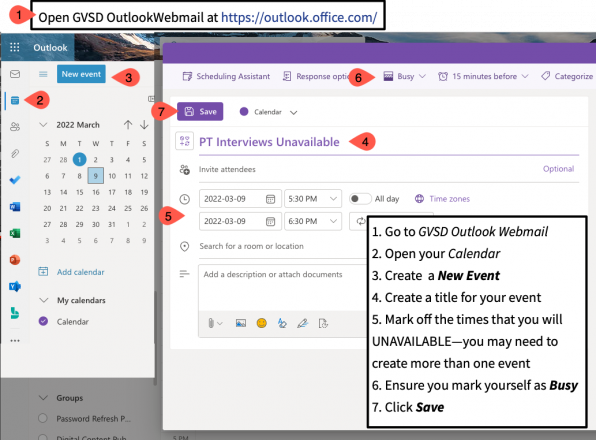
Book Out Using Outlook Web
Following the instructions on the diagram below go to your webmail app in a browser. Create a new event for the times that you will be unavailable. The bookings service will remove these times. (If the times have not been removed after following these steps please let the office know, as they may need to change a setting in Bookings).
Sending A Video Conference Meeting Link
Microsoft Teams
Teams does not have a PMI link to send to participants. You can however create a meeting that spans multiple days and use the same URL for all participants. In order to generate the meeting link though you must add an invitee to your meeting (you can send an invite to yourself using a different email address.)
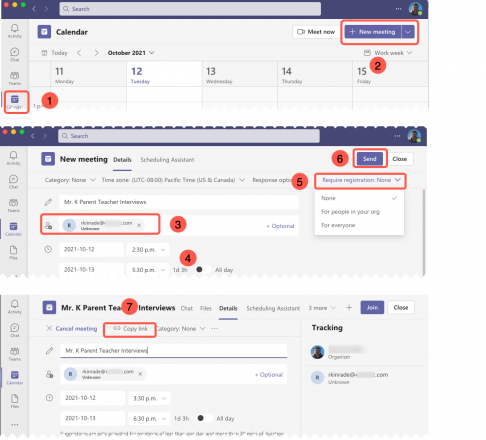
- Open Teams and click the Calendar icon on the left
- Click the New meeting button and title your meeting
- Enter an external email address
- Set the time for the meeting
- Ensure that Require registration is set to None
- Click Send to commit the changes
- A Copy link button will appear in the header area, and on the calendar page. Click on this to copy the link
- Paste the link in your email along with the rest of your message